


My kids doing their notebooking pages (2009)
What Is Notebooking?
Notebooking is a journal of what your students are learning each day. As you read aloud and discuss (from both Scripture and books), your students make a record of their learning.
The journaling happens on paper — anything from simple notebook paper to expensive scrapbooking paper. The easiest way to keep all this paper in one place is to store it in a three-ring binder, also known as a notebook. However, some families store their journals in spiral notebooks, and others use folders (often called “lapbooking”).

Notebooking in a 3-ring binder (image from homegrownlearners)

Notebooking in a spiral notebook (image from evenlodesfriend)
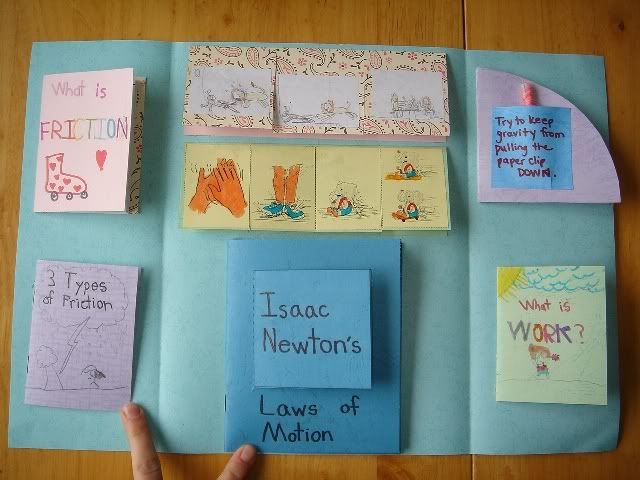
Lapbook (Image courtesy photobucket)
Why Use Notebooks?
We starting notebooking in 2009, and we started very simply. I’m not a crafty person. You won’t find me on Pinterest too often.
So why do we notebook?
We were already trying to discuss Scripture throughout our day, as the Shema states:
“These commandments that I give you today are to be on your hearts. Impress them on your children. Talk about them when you sit at home and when you walk along the road, when you lie down and when you get up. Tie them as symbols on your hands and bind them on your foreheads. Write them on the doorframes of your houses and on your gates” (Deuteronomy 6:6-9, NIV).
We were also looking at homeschooling methods in the book of Proverbs.
“My son, if you accept my words
and store up my commands within you,
turning your ear to wisdom
and applying your heart to understanding—
indeed, if you call out for insight
and cry aloud for understanding,
and if you look for it as for silver
and search for it as for hidden treasure,
then you will understand the fear of YHVH
and find the knowledge of God.
For YHVH gives wisdom;
from his mouth come knowledge and understanding” (Proverbs 2:1-6, NIV).
Notebooking became a way that we could go beyond discussions of Torah and store them up.
The biblical method of learning involves hearing, then learning (repeating information over and over), and then keeping it, by guarding it and reviewing it over a period of time. Notebooking became an excellent tool to make this happen on a practical level.
Listening and reading are usually the first steps in homeschooling. Discussion takes even more time and input from parents, so we need to be careful not to put it on the back burner. As a student then writes down what he has learned, in the form of a journal page for his notebook, in a paragraph or essay, or in a blog post, he is expressing how well he has learned something. (Of course, we should ideally go beyond even this step and do something with the information we have learned.)

What Supplies Will We Need?
You can get as fancy as you’d like, but you might actually notebook more often if you’ll keep it simple.
In our home, each student has notebooking supplies in his school crate, ready to go for the day.
- Plain white paper
- Lined notebook paper
- Tracing Paper (great for maps)
- Colored pencils
- Scissors
- Glue stick
- Binders (“notebooks”)
- Pencil pouches (to hold supplies)
- Divider Tabs
- Plastic sheet protectors
How Do We Notebook?

(image from navigatingbyjoy)
Notebooking is an idea with which I have a love-hate relationship. I love it because it provides my children with a creative outlet, it requires that they regurgitate what they’ve learned from our reading and discussions, and it gives them with a great way to review what they’ve learned as they look back through their notebook all school year.
I also despise notebooking some days. I don’t like the mess, with tiny bits of paper on the carpet under the table, stray crayons found in the toddler’s hand, stickers shoved willy-nilly back into the storage container, or crumpled up notebooking pages that never made it into the notebook to begin with.
I asked my kids what they think of it. They said that they like the drawing, cutting, gluing, and decorating parts, but they don’t like writing. (Aaack! Break this writer-momma’s heart!)
“Really?” I asked. I can’t remember a time in my life that I didn’t enjoy writing (or talking!).
“Mom, I never know what to say.”
“I hate staring at a blank piece of paper.”
“I don’t like writing in cursive.”
“We need ideas, Mom.”
Okay, so other than the “don’t like writing in cursive” part, I see a common theme here. No one is creative every day. It helps a lot to have some ideas of what to say or do on our notebooking pages.
This is one reason why our curriculum gives you notebooking ideas as often as we can! Using HomeschoolingTorah, you can use notebooks for Torah, Hebrew, History, Science, Spelling, Grammar, Writing, and even Phonics and Preschool!
And here is a list I made for my planning notebook, so that I could refer to it if I needed even more ideas:
Bible
- Copy memory verses.
- Illustrate what you heard in today’s reading. (Examples: days of creation, Noah’s ark, the ten plagues, the tabernacle, the defeat of Jericho, Solomon’s temple, miracles of Yeshua, etc.)
- Tell three things you learned in your private Bible reading today.
- Tell about the life of this Bible character.
History
- Timelines — Copy a picture of this person from your book or the Internet.
- Maps — Copy this map.
- Battles — Draw a map of this battle.
- List 3 or more reasons why this event happened.
- List 3 or more results from this event.
- Copy a Bible verse that could be applied to this event.
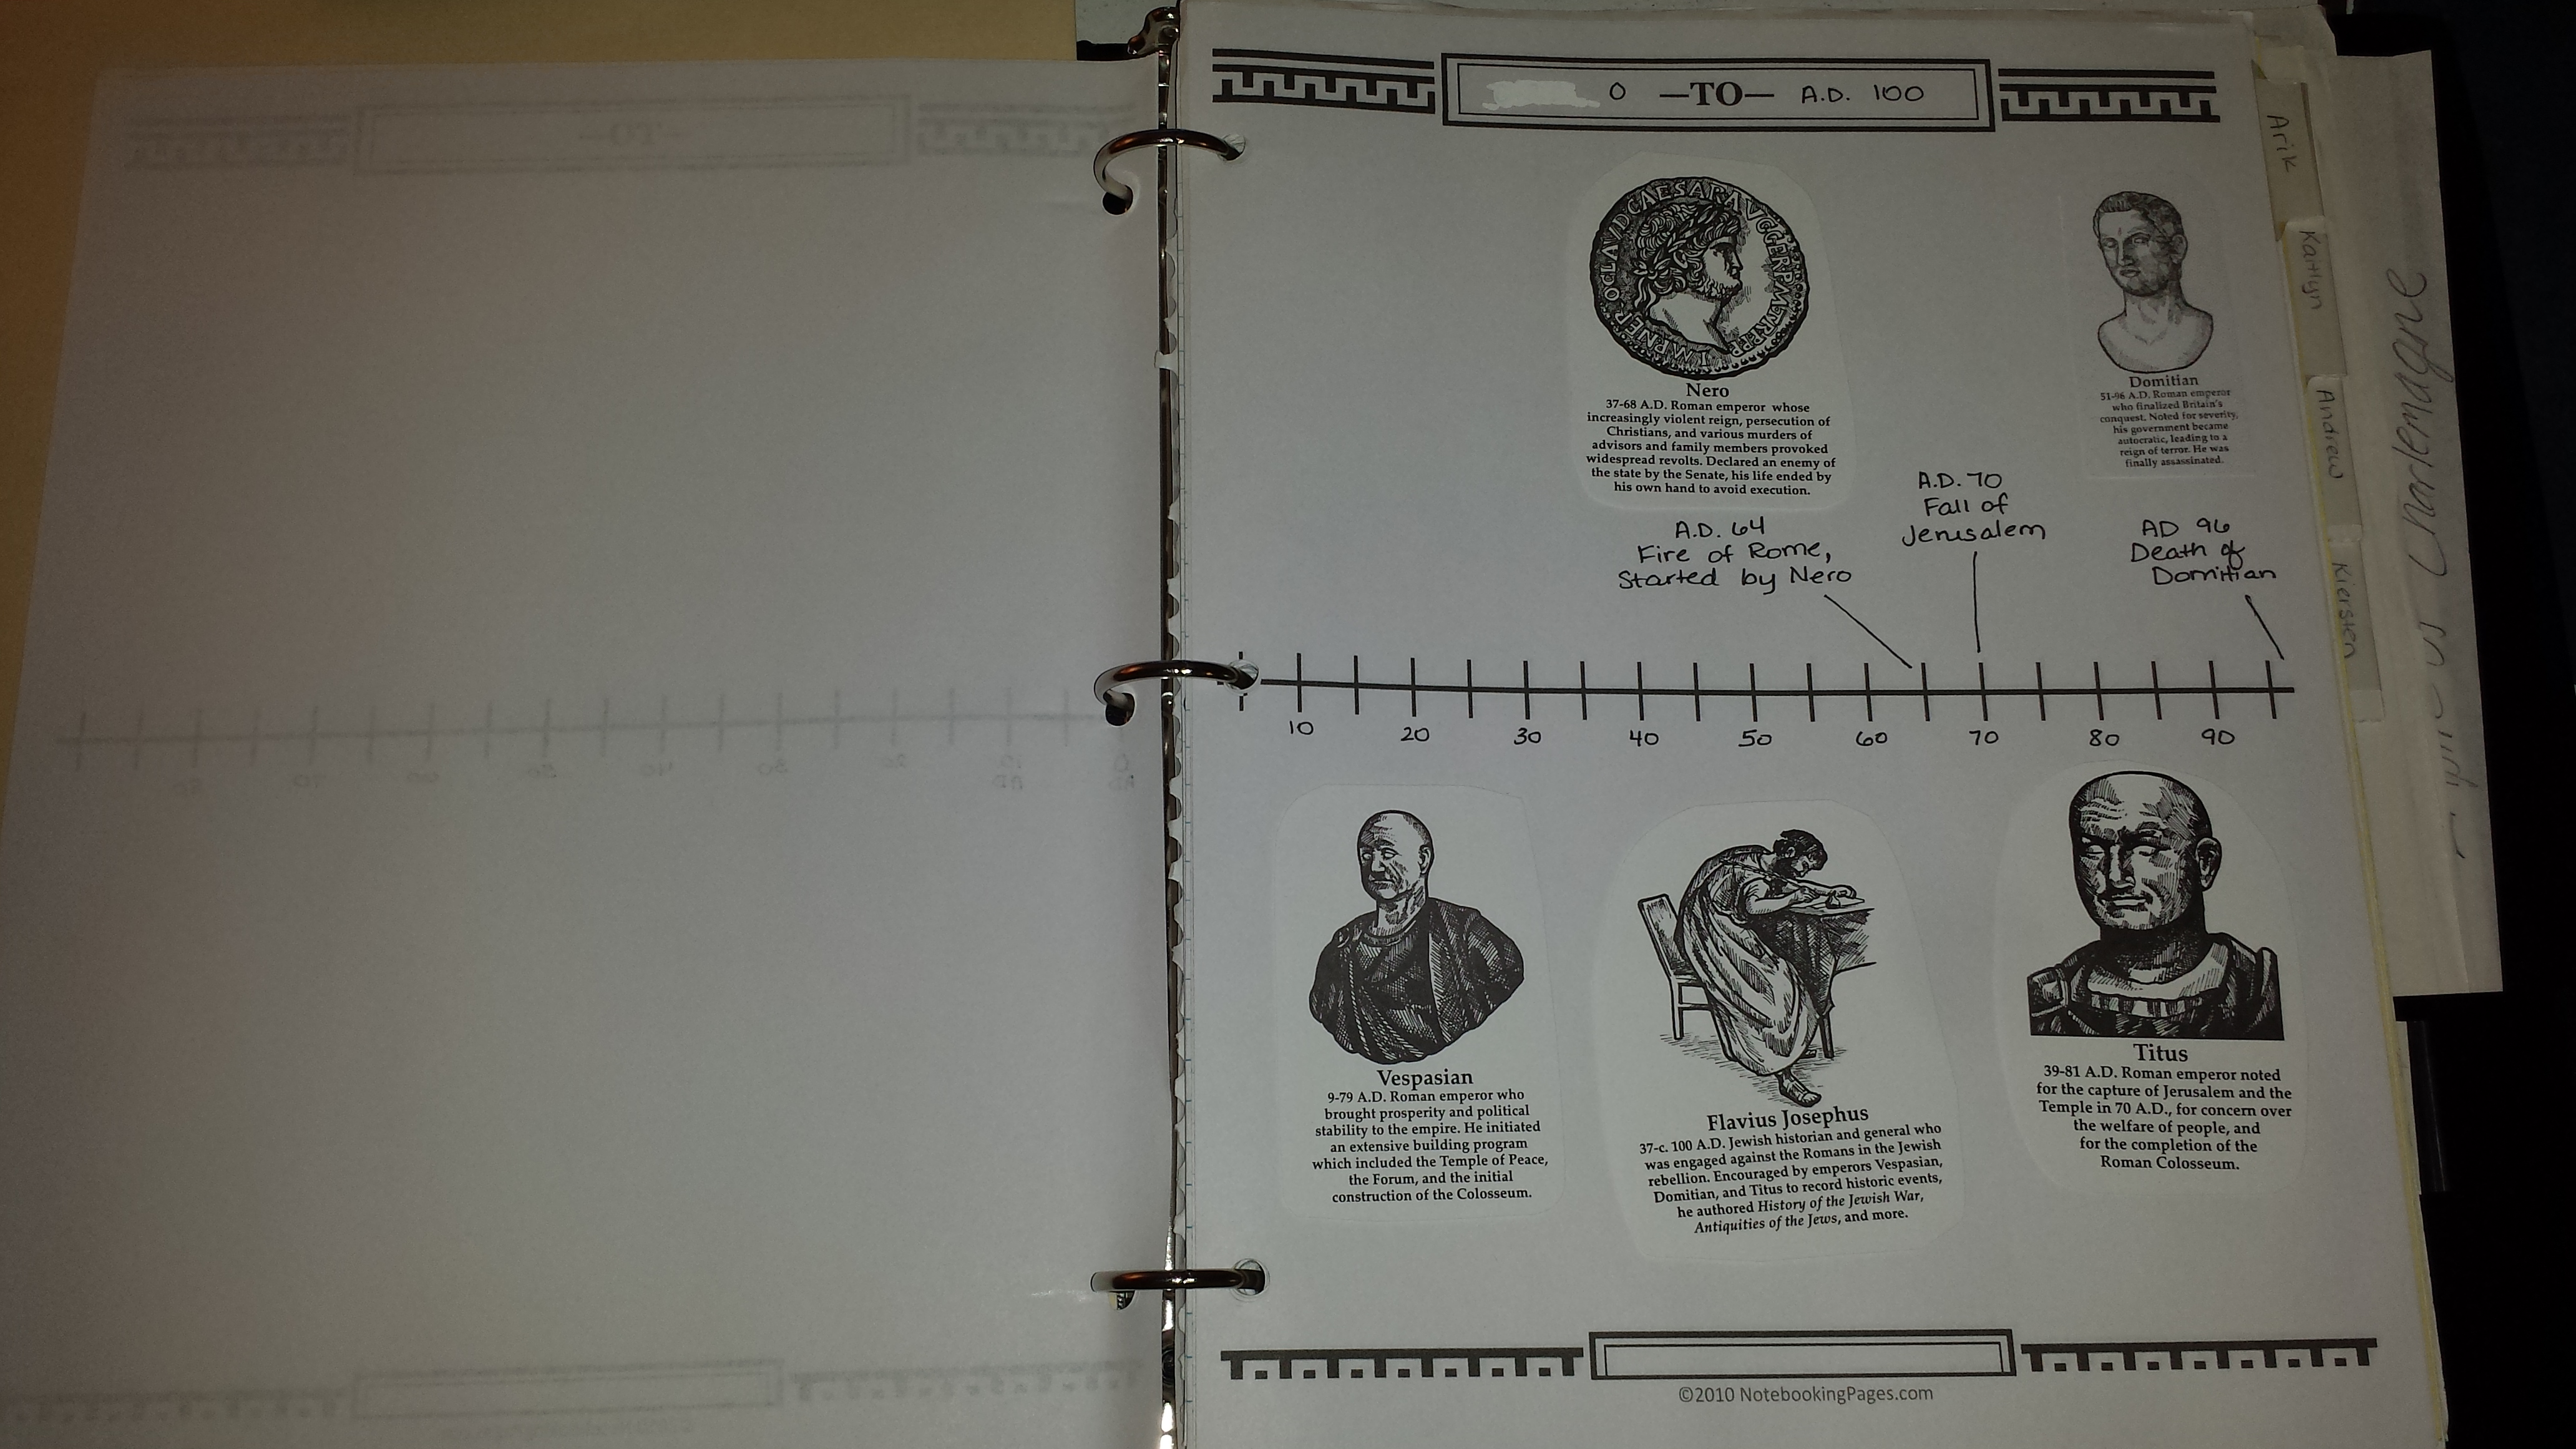
A page from our history timeline notebook
Science
- Experiments – Fill in a scientific method worksheet about your experiment.
- Illustrate this principle.
- Illustrate the planets discussed, etc.
- Copy the plant and label its parts.
- Draw a picture of this animal in its natural habitat.
- Tell why this is an evidence of God’s creation rather than evolution.
Writing
- Give three reasons why you believe your point of view is correct.
- Give three reasons why the Bible supports this view.
- Choose an audience for your story (a toddler, a grandmother, your next-door neighbor, etc.).
- Imagine what life would be like if… and tell about a day.
- Answer “who, what, when, where, why, and how.”
- 1st sentence: Tell me what your topic is. Then write three sentences about this topic. Finally, tell me why you wrote about this topic.
I personally downloaded the “Basic Lined Notebooking Pages,” and I simply print out a lined page for my children to use when I can’t find a more appropriate page for the day. This set includes over 200 pages with borders and boxes and multitudes of ideas, most of which are black-and-white for my kids to decorate, and a few of which are in color (if I have color ink in my printer). My kids enjoy surfing through them to pick one that fits what they are writing about that day. (affiliate link)

This was a picture of a cyclops for history

This was an assignment for Bible
It basically becomes “show and tell” of what they’ve learned, sometimes decorated like scrapbooking (much less expensively, in our case) or sometimes just written out on plain paper.
Helpful Blog Posts by Others:
More Resources:
- FREE notebooking starter kit and history timeline set — for all HomeschoolingTorah members
- Ready to make learning a more memorable and meaningful experience for your family? Get started with notebooking today! Get free templates and more from NotebookingPages.com for more notebooking information, freebies, products, articles, and tips, as well as for a variety of other free homeschooling charts and printables (affiliate link).
I hope this will help you get started! Share your best ideas below. 🙂
Views: 106