

During all years of our history curriculum, we advise you to construct a timeline with your children. If you started in ancient history and continued all the way through American history, through all of the Bible’s history, through the middle ages, through modern times and even the return of Israel to the Land, your children would have an impressive way to review everything they have learned. Year by year, adding new entries into their timeline, they would remember things they have learned in the past while being able to place new stories into their context of world events.
There are a few ways to construct a timeline. Many homeschooling families like to make one on the wall, and I like this idea if the following can be done:
- You have a large enough wall to place entries for 6000 years of world history!
- You are fairly sure you will have the same house, the same school room, for 18 to 25 years (or more), as all your children go through their school years.
Neither of these points worked for our family. We have moved 9 times since my oldest son started kindergarten in 2001, and our current home is quite small.
I’ve really enjoyed having one timeline book that we have shared for all 7 of my children. Some families like making one per child. We bought ours from Sonlight Curriculum back in 1999, and it has served us well over the years, but you could easily make your own. If you’d rather purchase one that is pre-made, check out the Book of Centuries by Cottage Press, My Timeline Book of World History, or Book of Centuries by Wildflower Press. (If you would like to recommend another one, please share in the comments!)
To make your own, start with a sturdy 3-ring binder that will last over the years (or plan to take your blank pages to a local copy shop to be spiral bound). If you’re a member of Homeschooling Torah, you can print free notebooking pages (a gift from NotebookingPages.com). Page 10 of the download is my favorite for making a timeline binder. Print this page on heavy card stock so that it will “last for the centuries” of your homeschooling. (wink)
Ready to make learning a more memorable and meaningful experience for your family? Get started with notebooking today! Get free templates and more from NotebookingPages.com for more notebooking information, freebies, products, articles, and tips, as well as for a variety of other free homeschooling charts and printables (affiliate link).
How many pages should you print? Most ready-made timeline books cover from 5000 B.C. to the present, although our history curriculum places the date of Creation at 4004 B.C. You can save several pages by starting there! 🙂 Also, you will have fewer events to place on the ancient history pages than you will in modern times. You might plan for 100 years per page up until the time of Yeshua, and maybe 50 years per page after that. You might even choose to have 10-25 years per page during the past 100 years. My recommendation is to print about 100 pages. If you took these to a print shop, or if your home printer can handle it, I recommend printing these front-to-back.
Then label the tops of each page with the dates. (This is a good job to assign to one of your older children.)
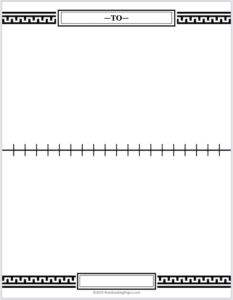
Sample Blank Timeline Page
Now it’s time to get started! Simply start adding dates from your daily history lessons. You can be simple about it and just write events onto the timeline, or you can find pictures to go along with each event. Here is a picture of one of the pages from our book. Do you see how we did a little of both? (Click the image to get a closer look.)
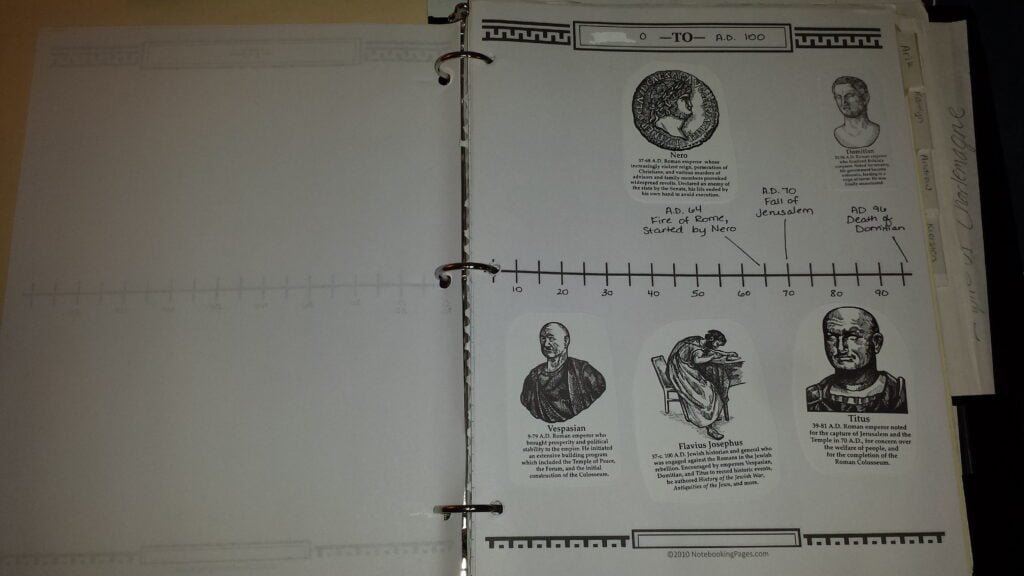
A page from our history timeline notebook
We bought those great images from Amy Pak at Homeschool in the Woods, by the way. I highly recommend getting her sets of images! If you need a picture of an event she doesn’t include in her sets, try doing an image search online. It’s easy to find great pictures! Your children may even enjoy designing their own.
Each of our years of history curriculum uses books by Christine Miller from Nothing New Press. She publishes a great e-book of all the timeline dates, and if you’re making your own timeline book, I recommend getting her e-book, printing it, and placing it at the back of your timeline as a sort of “index.” (Members of Homeschooling Torah receive this e-book as a free bonus.) She bases her dates on a lot of research that agrees that the Bible is historically accurate, unlike most other publishers and authors, so even if the timeline figures or dates in other history books disagree, I use her dates instead. You might want to write a little note on a page when this happens, so that your children understand that dates can be a little controversial at times.
Be sure to add very important dates (such as the ones we memorize in our curriculum). If a Bible verse mentions an event, it might be a good idea to write the reference by the event. However, the fun happens when you add MORE events to your book than the ones that are memorized. You can even add your children’s birthdates and other family memorials to the modern times.
You’ll want to have a container of supplies handy, so that you aren’t tempted to skip this important activity. If you printed timeline figures from Homeschool in the Woods, then keep them all in a folder near your school table. Keep scissors, a glue stick, and a fine-tipped permanent marker nearby (or use colors if you like that better).
I recommend keeping your timeline book in a special place of honor in your home. Pull it out almost daily, during your history lessons, and review the dates you’ve read about recently. Bring it out on Friday evenings, at your special erev Shabbat dinner, to show Daddy and guests what you learned this week. Reference it when you read a chapter book that mentions a specific historical event. Place it in the living room on a coffee table sometimes, and just leaf through it. Talk about it over the years. Help your children truly visualize the history they have learned.
Do you have a timeline book for your homeschool? Tell us all your recommendations and best tips below!
![]()
Views: 64